Promoting blog articles on Facebook is one of the easiest and most efficient ways of driving more traffic to your website.
However, there’s a huge difference between good Facebook traffic and bad Facebook traffic.
Most people that click on your blog promotions or Facebook ad are just passengers-by.

So instead of simply posting a blog article on your Facebook page and setting up a $50 boosted post, you should aim to convert people seeing your promoted post into high-potential leads.
Otherwise, people will just click on your Facebook ad, visit your blog once, and then forget about it.
That’s not exactly the relationship you’re looking to have with your readers, right?

What can you do differently to get good results out of your Facebook blog promo?
In this article, you’re going to find answers to three main questions haunting content marketers and Facebook advertisers alike:
- How to advertise blog via Facebook in the most efficient way?
- How to ensure that people are going to click on your promoted post?
- How to turn cold leads into email subscribers, and eventually, customers?
All the hacks and best practices in this article are based on personal experience of promoting multiple blogs on Facebook (including the blog you’re reading). After more than 2 million ad post impressions and 100+ Facebook blog promos, here are the key takeaways.
1. The Golden Rule of Blog Promotion: Always Share Your Content on Facebook
Whenever you publish a blog article, infographic, or release a guide, take 10 minutes to post it on your Facebook Page.
This is beneficial in many ways:
- You’ll keep your fans updated about new content
- Your article will reach new people who may become fans
- Posting regularly shows you’re active and more trustworthy
- Your fresh article will get a boost it needs to be read and shared across the web
- You could be offered guest blogging opportunities from top blogs.
For 10 minutes of your time, that’s a lot of benefits and fame.
Even if you don’t have that many Facebook page fans, it makes sense to share your post.
In the beginning, your post may organically gather only 1-2 likes (one of which is coming from yourself), but that’s fine. You will grow your followership eventually. Especially with the hacks you’re going to learn in a sec.
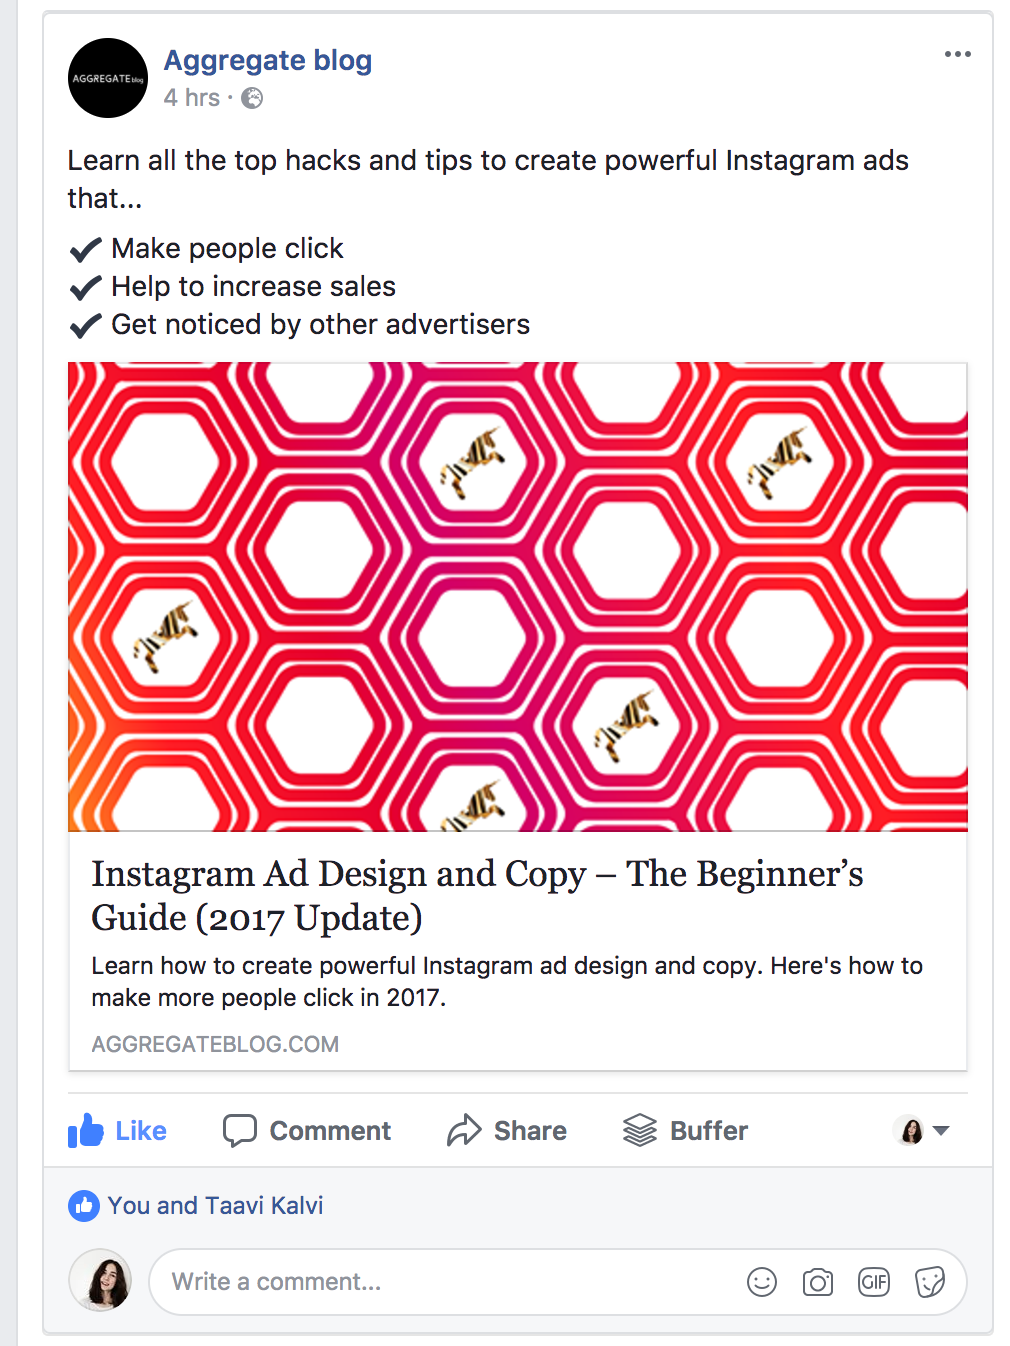
2. Share Your Blog Article as a Facebook Post
The easiest way to share your blog articles on Facebook is to copy-paste the article’s link into your Facebook’ page’s publishing box.
As you insert the link, Facebook will add the image, headline, and link description. You can edit these or use the default copy. You will also need to write a text for your post.
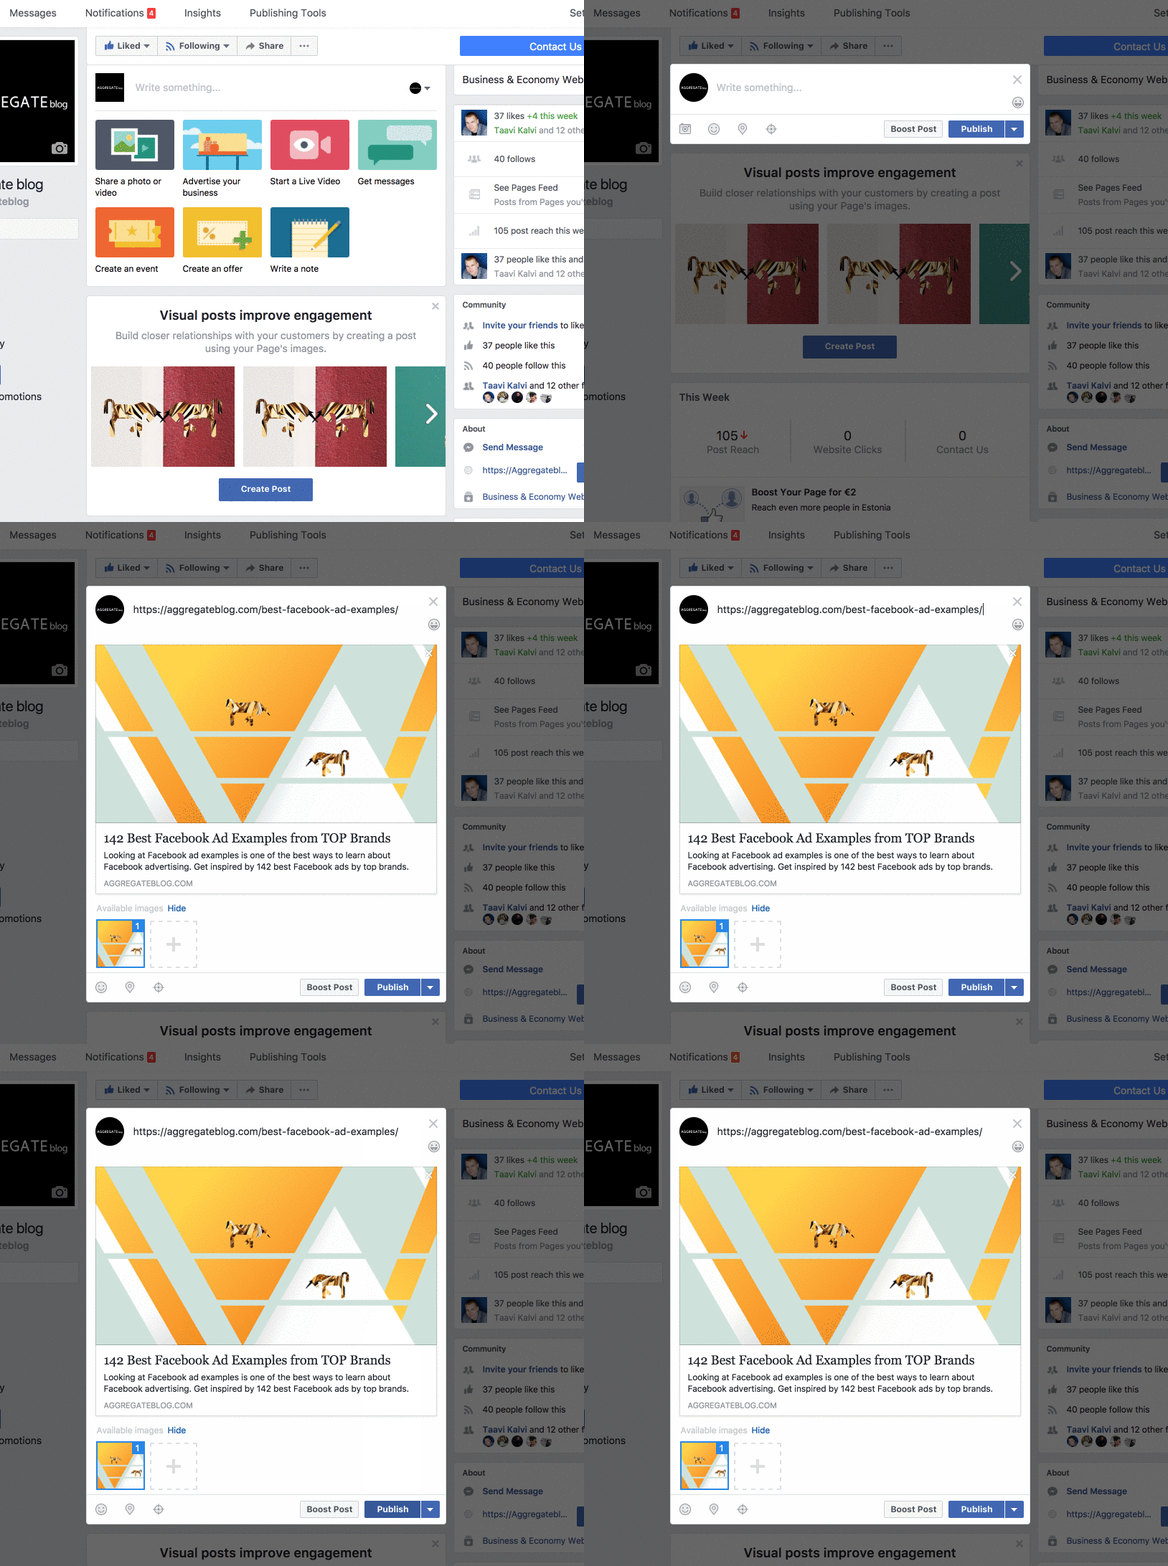
Note that you need to go to the Business Manager page when publishing something on your Facebook page. Otherwise, the post won’t be published by your brand but you.
Tip: You can bookmark the Business Manager view of your Facebook page for quick access.

3. Set the Right Target Audience
As a recent change, Facebook is letting advertisers optimize who will see their Facebook posts.
You can tell Facebook who’s the ideal audience for your post’s organic reach. (And you probably had no idea the Facebook Audience Optimization feature exists!)
Here’s how it works.
When adding a new post to your Facebook page, click on the little target-shaped icon to select your preferred target audience.
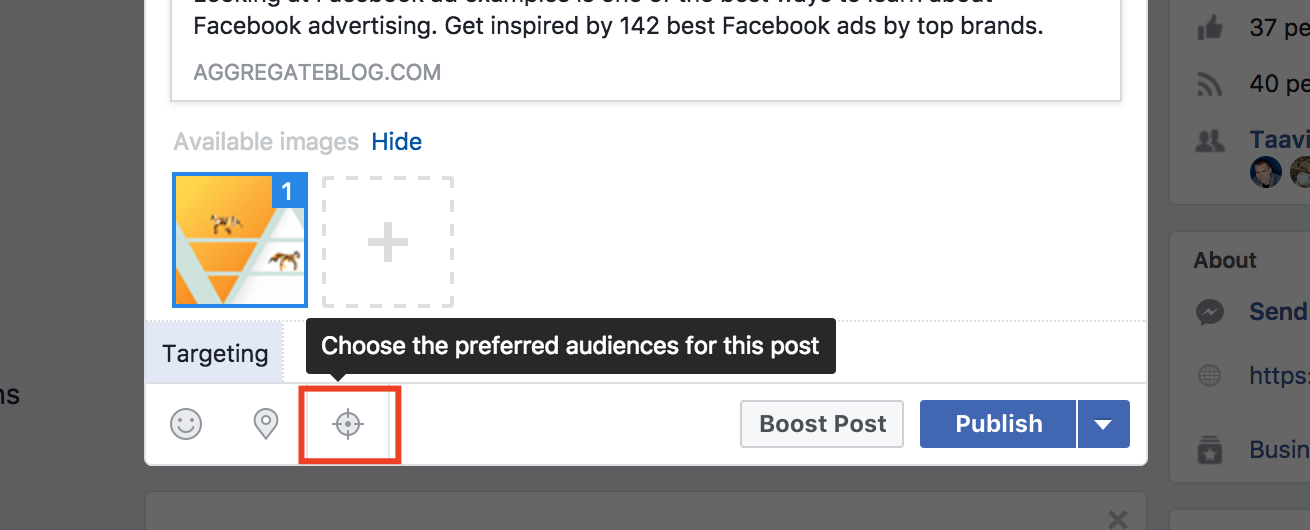
Once you click on the icon, a new pop-up window will appear where you can optimize your post’s target audience based on their interests. It works just like creating a Facebook Saved Audience.

Another thing you can do is setting audience restrictions to tell Facebook who is or isn’t allowed to see your posts. For example, you can set the age, language, and location to target specific people with every Facebook post.

How to activate the Automated Audience Optimization:
Important: If your Facebook page has fewer than 5,000 likes, you may need to turn it on manually. Simply click the “Settings” tab in the top right corner of your Facebook page. From the “General” tab, you’ll see a row for “Audience Optimization for Posts.”
Click on “Edit” and check the box to activate the Audience Optimization. Then, hit the “Save Changes” button.

Every time you publish a new Facebook post, let the algorithms know who it is you’re targeting (or in other words, who will find your Facebook post relevant and interesting).
Reaching the right audience already in the posting phase does two things:
- Your post has a higher relevancy so Facebook will distribute to more people.
- As people find your Facebook post relevant, they will like/share it and it reaches more people.
4. Write a Strong Headline
While your Facebook ad design is what catches people’s attention, it’s usually the headline that people decide on whether to click or not click on your post.
So how can you write a good headline for your blog promotion when sharing articles on Facebook?
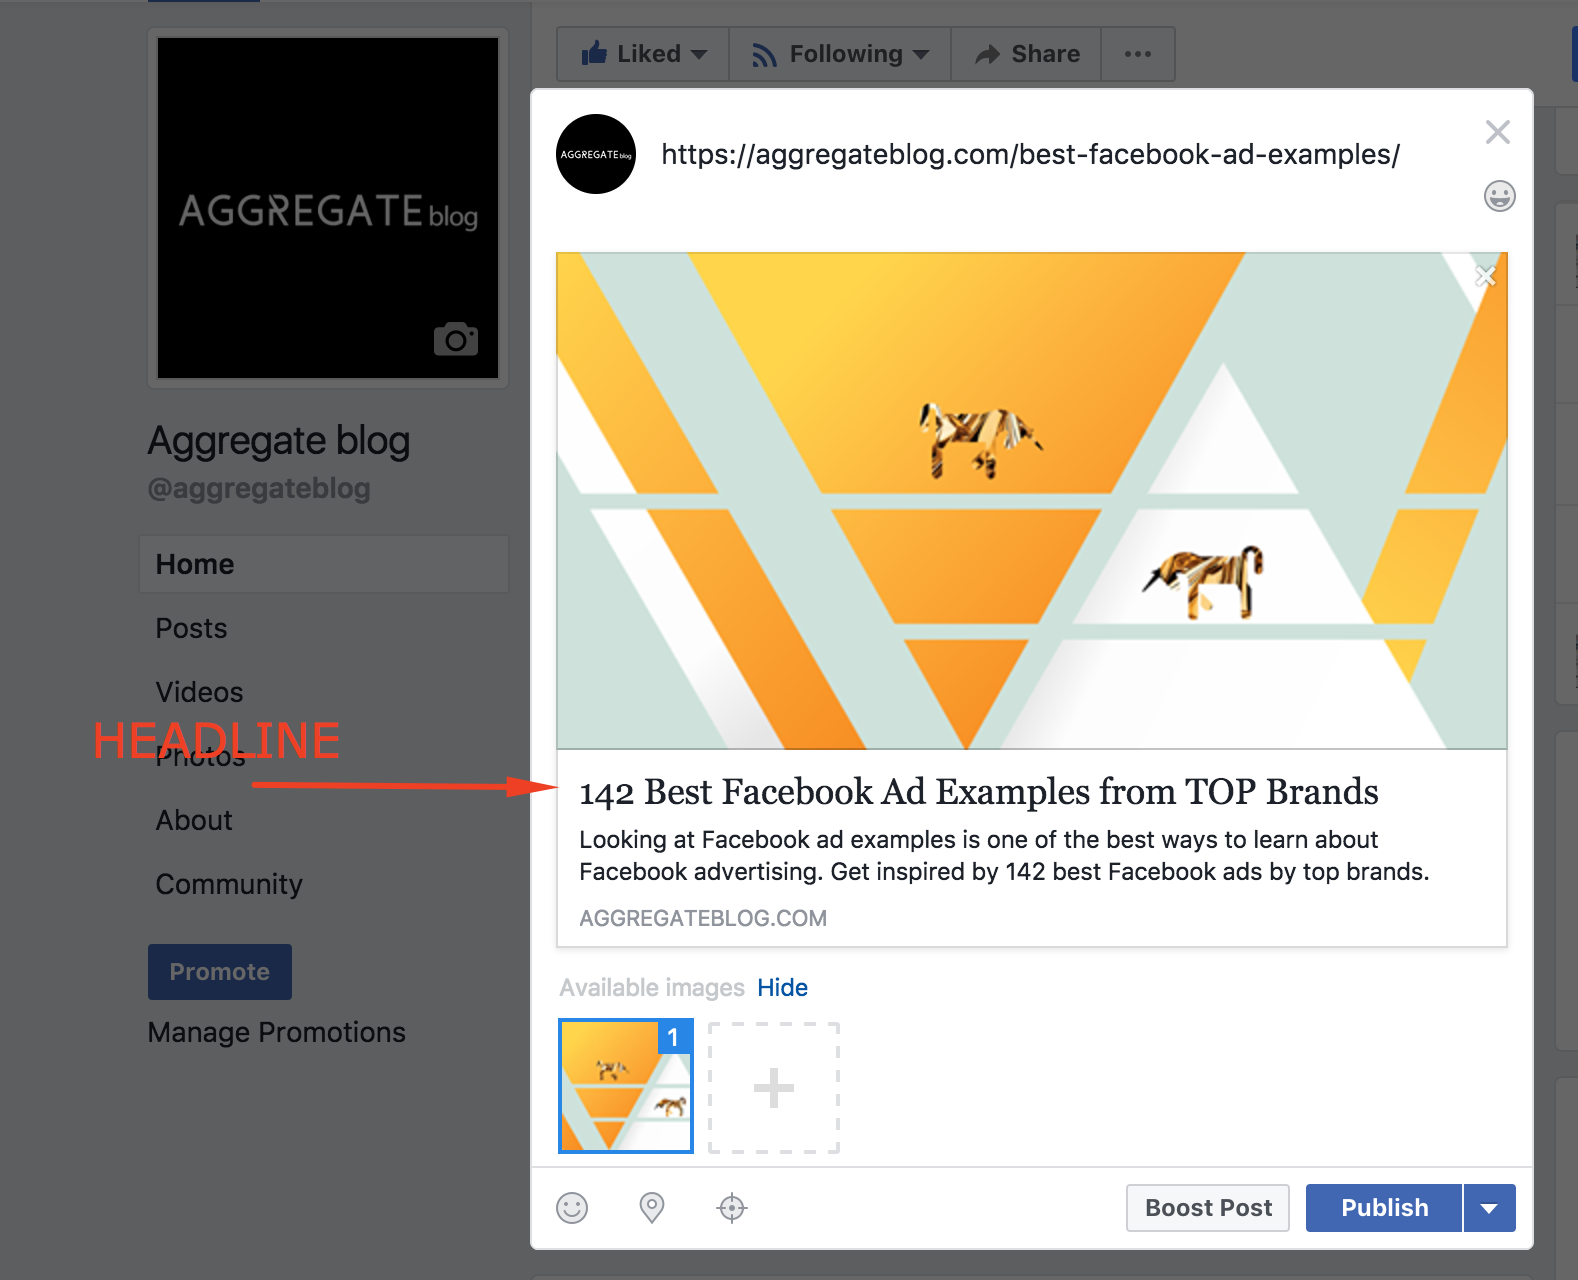
Here are a few suggestions for writing good Facebook post headlines:
- Use numbers – By starting your headline with a number, you’re 36% more likely to have people click on your ads.
- Use unordinary wording – Always try to find interesting words, e.g. “magnificent,” “major,” or “extraordinary” instead of “good” or “best.”
- Keep it short – A study by Outbrain found that headlines with 60-100 characters result in the highest click-through rates.
If you’re unsure whether you’ve come up with a strong headline, try the Headline Analyzer tool by CoSchedule.
5. Write a Compelling Introduction
A high number of people who click on your Facebook post do it based on the image and headline alone.
However, there are also those who read through the entire copy before deciding whether your shared article is worth their time.
Moreover, the device people use when seeing your Facebook post plays a role: in mobile, the text part is a lot more prevalent.
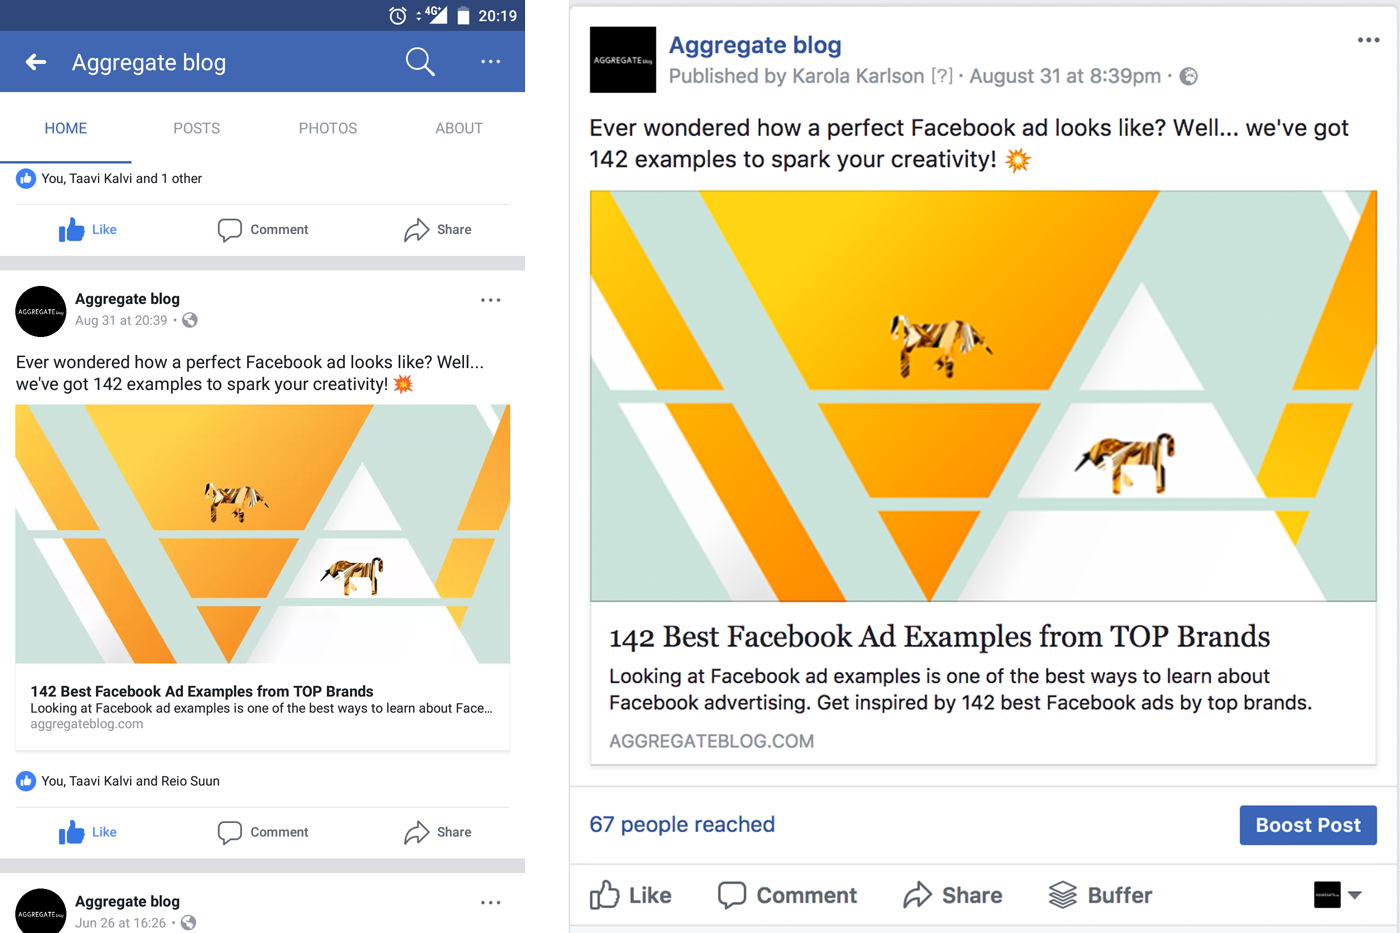
All things considered, you should always ensure that all parts of your promoted post’s copy are best in class.
On Desktop, people will judge your post based on the headline.
On Mobile devices, your above-image text grabs the most attention.
Whenever writing copy to share a blog article on Facebook, follow these rules:
- The first sentence must catch everyone’s attention – you can insert a bold statement or a question.
- Your text should show some personality – keep it conversational as you were writing to a friend.
- The layout must be easily readable – if you want to write more than 2 lines of text, use the line spacing to format your text for higher readability.
6. Use Symbols and Emojis for Extra Attention
Another easy way to spice up 🌶 your Facebook posts is to insert custom symbols and emojis.
Here’s an example by Buffer:

Take a look at these 142 Facebook ad examples to see how top brands are using emojis in their Facebook promotions.
We once ran a small Facebook ad A/B test with SaaS startup Scoro to test whether emojis have any effect on the click-through and engagement rates. They did.
The ad with emoji in the headline had a 241% higher click-through rate than the ad with no emoji.
While a 241% difference is unusual, you can still use emojis and symbols to bring more life to your posts.

See this article to learn exactly how to use emojis in Facebook ads.
7. Create the Perfect Facebook Post Design
As you publish articles in your blog, they probably have a featured image.
However, the image size of your blog post may not exactly match Facebook’s specs.
That’s why, you can create a slightly altered version of your blog image to use on Facebook.
I do not create a new Facebook sharing image for every blog post, but as this blog’s featured images are in an unusual landscape format, they sometimes don’t look that good on Facebook.

Here are all the Facebook link post guidelines you may need:
- Image size: 1200px X 628px
- Image ratio: 1.91:1
- In-image text: less than 20%
If you’re interested in more ad sizes for both Facebook and Instagram, see this guide: Instagram Ad Specs & Ad Size in 2017 – The Always Up-to-date Guide
If you’re using WordPress to manage your blog, you can use the Yoast SEO plugin to optimize your social media sharing settings and change the image.

We’re not going to stop on the Facebook post design in this article as there’s an entire guide with 25 suggestions and hacks for you to check out: 25 Facebook Ad Design Hacks for Major Success
However, there is one important suggestion you should know… ?
8. Avoid Regular Stock Photos for promoting your blog
If you’re using free stock photos as your blog images (yes, also those beautiful Unsplash photos are stock photos), you’re missing out on an opportunity.
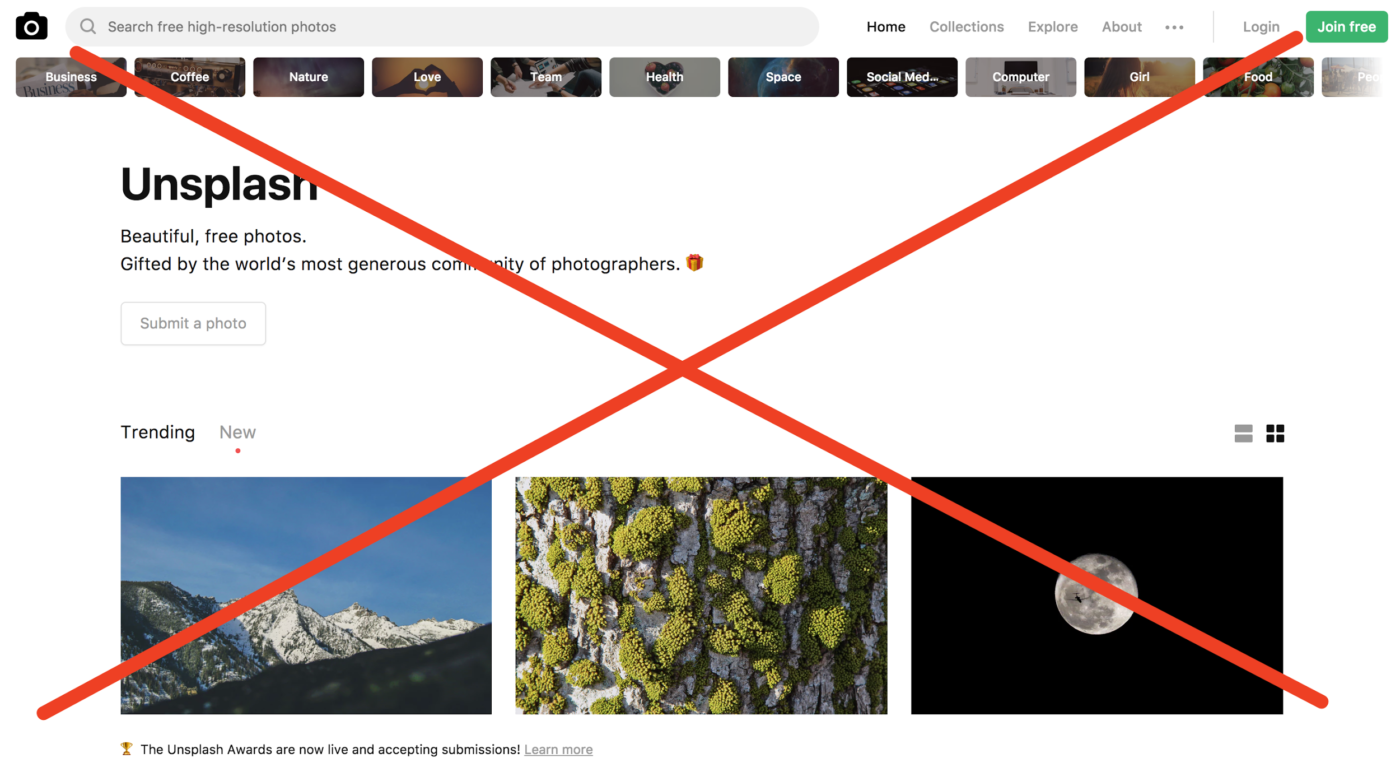
Think about it… You spend 10+ hours crafting the perfect Facebook post and then you’ll illustrate it with the same boring stock photo that everyone else is using. Not a good idea.
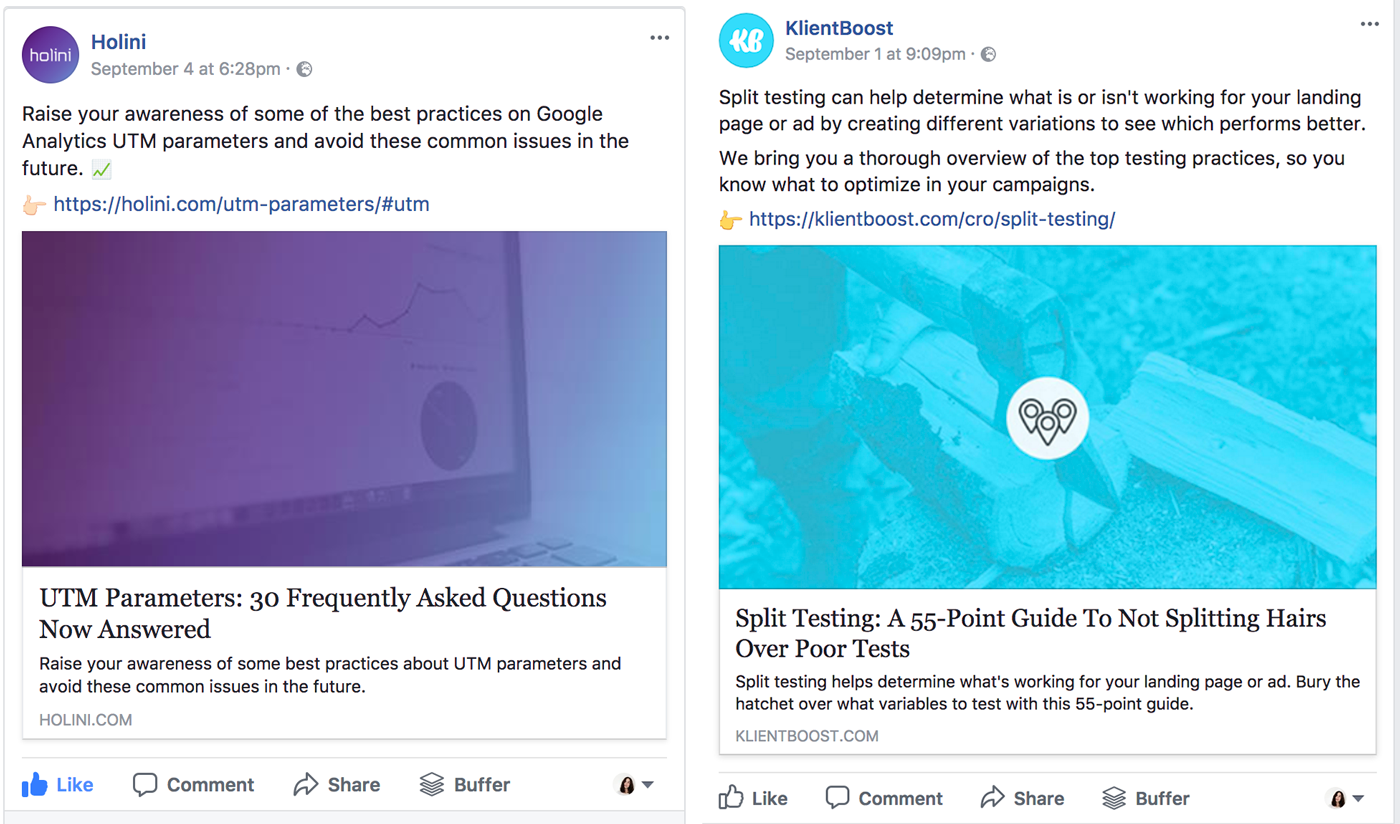
Instead, try to develop a specific brand language for sharing your blog articles on Facebook.
For example, you could use a colourful image overlay like Holini and KlientBoost.
Or if you love designing your own blog images, you could take an even more original path like BuzzSumo and AdEspresso.
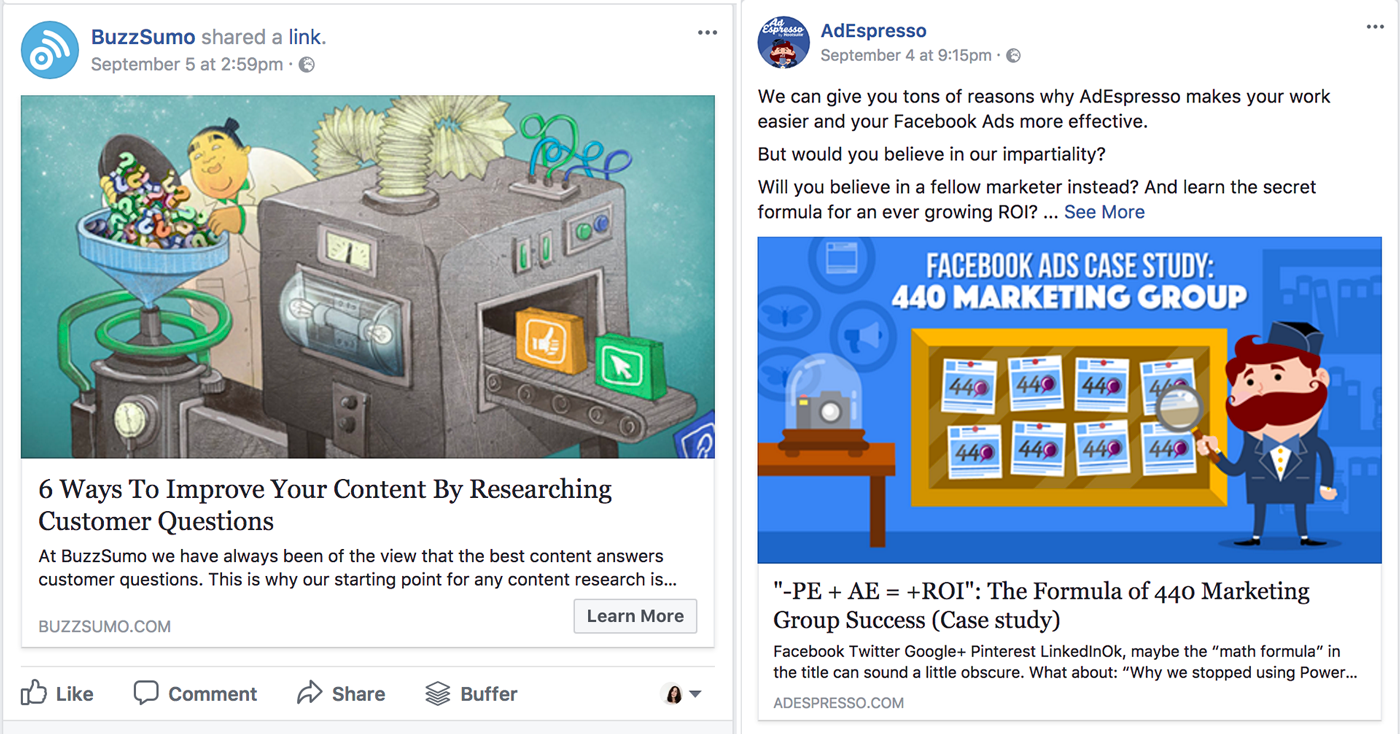
As you continuously use a branded style, people will get used to seeing your posts in the news feed and will better recognize your brand in the future.
9. Test Image Posts vs. Link Posts
You may have noticed that not all Facebook promoted posts have a headline and link description.
For example, compare these two Facebook posts by Buffer:
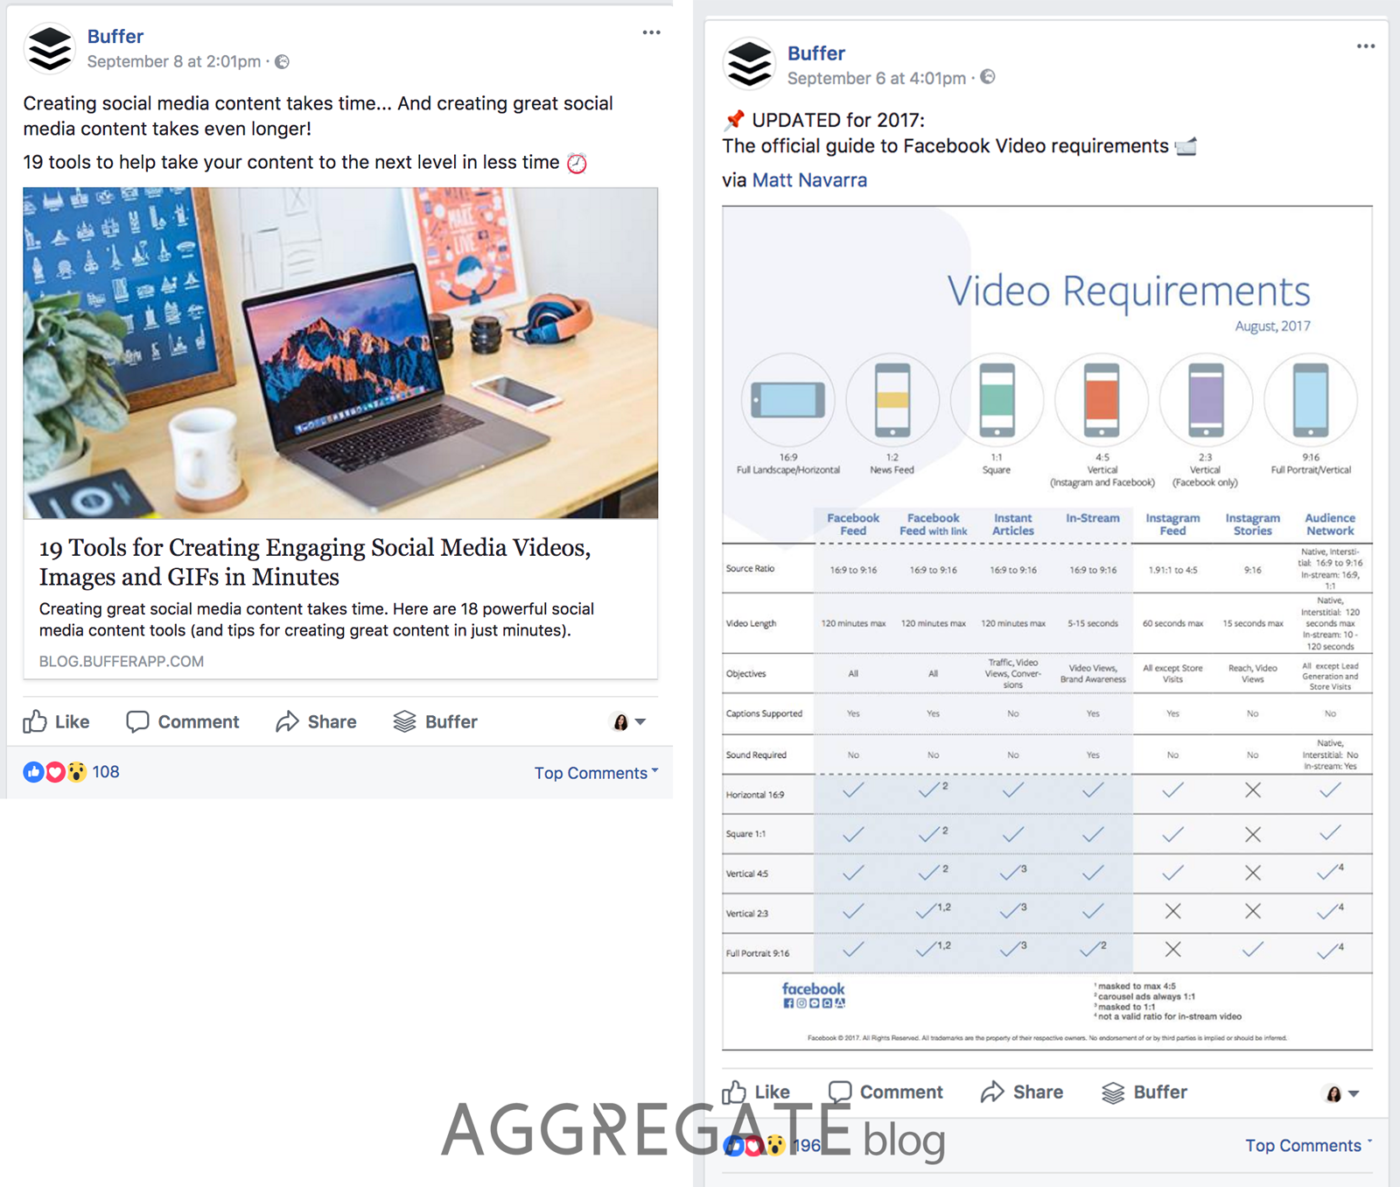
The post on the left is a link post while the image on the right is an image post.
1. Link posts
The image on the left is a link post that you can create by copy-paste-ing your blog article’s URL into Facebook’s new post box.
PROS: As people click anywhere on the post, they’ll be taken to the landing page. So your entire Facebook post will be clickable.
CONS: Link posts usually take up a lot less space in the newsfeed as the image size is always 1200px x 628px.
2. Image posts
The image on the right is an image post which consists of an image and text.
PROS: Image posts take up a huge chuck on newsfeed real estate, meaning that they can catch more attention. Some brands, like The Dots, are even using image posts as Facebook ads.
CONS: As people click on the image, the image will open up on Facebook, not take them to your website. The only way for people to reach your URL is for them to click on the link inside the text.

Which one should you use: link posts or image posts?
Usually, image posts work well if you’re sharing visuals and targeting an existing fan base. They’re also great for brand awareness campaigns.
If your goal is to drive maximum amount of traffic to your blog, share your blog articles as link posts. This format also works well for Instagram advertising.
Pro tip: Use a shortened link in your image posts, to keep your text cleaner. Here’s Google’s link shortener to help you out.
10. Test Carousel and Slideshow Posts
Want to know a secret that 95% of Facebook marketers don’t know?
(It’s going to change your Facebook page’s feed forever)

Ok, here it comes…
You can also create carousel and slideshow format Facebook posts. They look just like carousel and slideshow ads, only you can publish them to your Facebook page.
Just click on the “Share a photo or video” icon.
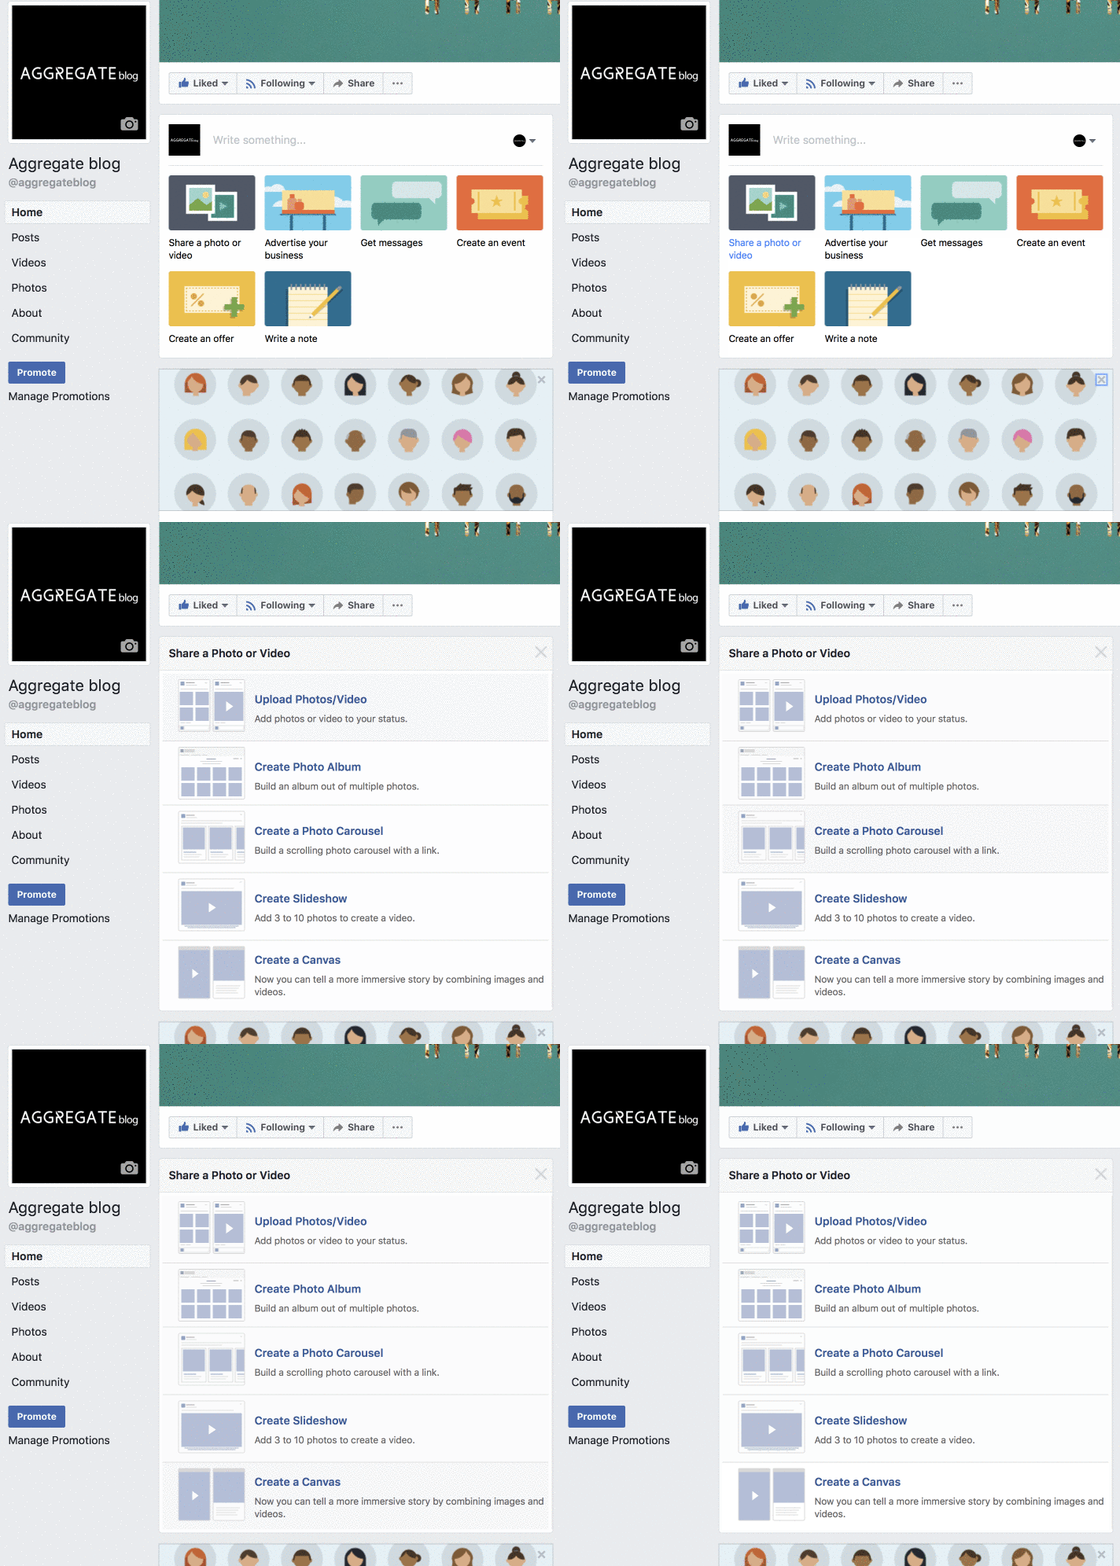
When creating a carousel post, you can showcase up to 10 images from your website in a single post.
Just enter your blog’s URL, and Facebook will let you choose the images that will be included.
Promoting your latest blog posts is THE best use case for this kind of post.

Tip: If you use this type of post now, you’ll be among the first brands to do this.
11. Ask for Your Team’s Support
Once you’ve published your blog article on Facebook, you can take a deep breath and relax.
But only for a few minutes, because only 20% of the work is done. Even more important than the publishing is how you’re going to distribute your Facebook post.

The first thing to do right after you’ve published a Facebook post is to ask your team members to like and share it.
Just post the link to your Facebook post into a group chat or some other group with your colleagues.
That’s how you will get the first 10-20 likes and increase the Facebook post’s organic reach.
12. Promote Your Blog Post on Facebook
The next step (after you’ve had the support of your team members) is to get the love from your existing fans and customers.
The sad thing about Facebook posts is that they never reach all your page fans organically. In fact, Facebook Engineering Director Lars Backstrom has warned that the organic reach is getting record low.
In 2014, Social@Ogilvy found that organic reach for pages with more than 500k fans had dropped to as low as 2%. For pages with less than 500k fans, organic reach dropped to 6%.

Last year, Marketing Land reported Facebook’s organic traffic was down by 52% for publishers.
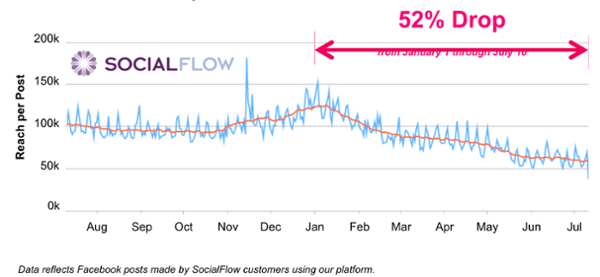
All numbers and stats considered, you’ll need to promote your Facebook post if you want it to reach more than 100 or 1,000 people.
13. Set Up a Facebook Post Promotion
To promote your blog article on Facebook, you have two options: setting up a Boosted post or a Facebook ad.
Let’s find out what’s the main difference.
1. Boosted post
Using a Boosted post is the easiest and fastest way to promote your Facebook post. Simply click on the “Boost Post” button and proceed to a 1-minute setup process.

PROS: Quick and easy. Gives “ok” results. Good option for beginners and small under $50 campaigns. You’ll get all the targeting options available for Facebook ads.
CONS: You can only boost a post to one target audience at a time which might often be limiting. You won’t be able to optimize the ad placements and schedule.
2. Facebook ad
To create a Facebook ad of a Facebook post, go to the Facebook Ads Manager and set up a new campaign.
When creating the visuals, you can select the “Use Existing Post” option and select your Facebook post.

PROS: You can optimize the ad placement, advertise the same Facebook post to multiple audiences, and optimize your ad delivery on reach/clicks/conversions – whatever you prefer.
CONS: If you’re not too familiar with Facebook advertising, it might take some time to set up the new ad campaign.
However, you can re-use the same Facebook ad campaign for promoting multiple blog posts. (Just create a new Ad Set every time)
If you’d like to learn more about setting up a Facebook ad campaign, read this article: From 0 to Results – How to Set Up Low-budget < $500 Facebook Campaigns

Final verdict: If you’re planning to spend more than $50 per Facebook promoted post, use the Facebook ad format. Otherwise, boost your posts to save time.
Small business? If $50 is significant amount money for your brand, also go with the Facebook ads option.
14. First, Advertise to Your Fans
Who are the people most likely to like and share with your Facebook post promotions?
Usually, it goes like this:
- Your team
- Your fans
- Your customers
- People interested in your article’s topic
However, brands often set their Facebook promo targeting like this:
- People interested in your article’s topic
- –
- –
- –

Before you promote your blog article to a wide audience of people (based on their interests and location), promote it to your fans and customers.
This way, you will get a nice basis of likes and shares from your fans. Moreover, they are the most important people to be informed about your new posts – you do want to keep the fan engagement high, right?
How to target your fans and customers?
First, you can target your Facebook page’s fans and their friends in a single click.

To target your customers, your can create a Facebook Custom Audience based on your customers’ email addresses and names.
Read more about Facebook and Instagram audiences in this guide: 84-point Guide to Master Instagram Targeting
15. Target Multiple Audiences
If your blog promotion’s budget is limited, you may not be able to do this.
However, if you’re willing to spend $100+ per a Facebook promoted post, you can create multiple target audiences to see which one performs best.
For example, you could test these five high-ROI Facebook promotion audiences:
- People who have visited your blog in the past 30 days (Custom Audience)
- People similar to your blog readers (Lookalike Audience)
- Friends of your Facebook page fans (Saved Audience)
- Interest-based audiences that align with your blog articles’ topic (Saved Audience)
- Your newsletter subscribers, especially all inactive subscribers (Custom Audience)

Also, keep a close eye on your Facebook Ads manager reports to know which audiences show the highest engagement, best CPC, and convert on the offers on your blog.
16. Measure the Right Metrics
How do you measure whether a Facebook boosted post was successful or not?
Do you look at the number of impressions? The number of clicks? The reach?
All of these vanity metrics give you no real insight into how well (or not well at all) your Facebook promotions perform.
Facebook’s not making it any easier, only showing two irrelevant metrics in the Boosted post reports.

OK. Let’s cure this mistake and find out which Facebook post metrics truly matter.

Do not measure:
- Impressions
- Clicks
- Reach
Do measure:
- CTR
- CPC
- Time on page
- Pages visited
- Conversions
CTR – The click-through rate of your Facebook promoted post shows how relevant it is to the audience. A good CTR is anything above 1%, a really good CTR is above 2.5%
CPC – The cost-per-click shows how much you pay per one blog visitor. If two audiences you’re targeting have highly different CPCs but the same lead quality, you could allocate all promotion budget to the best-performing Ad Set.
Time on page – If you’re tracking your Facebook ad campaigns with UTM codes, you can easily check in the Google Analytics how much time people spent with your article. Always aim to target high-quality audiences that won’t immediately bounce away from your site.
Important: The Time on page in GA is the time between 2 interactive hits. The Time on page metric is accurate only if the page is not the last page in the session.
Pages visited – As people in your Facebook blog traffic visit more than one page, it means they’re interested in your blog content and highly engaged. You can increase the no. of pages visited by adding suggested articles in the sidebar and at the end of your article.
Conversions – You’re probably trying to convert your blog readers into email list subscribers and customers. You should always track whether your Facebook blog post promotions help to bring you new fans, leads, and revenue.
To get started with Facebook ad tracking, install the Facebook Pixel to your website.
If you’re interested in advanced ad reporting in the Facebook Ads Manager, see this guide: Instagram Ads Reporting and Optimization – Guide to 10x Results
Bonus Tips !!!
Just to make sure you’ll get the best expert knowledge for tracking and analyzing your Facebook ads, we asked Taavi Kalvi, one of the best Google Analytics and Tag Manager experts and the partner and Analytics Lead at Holini, to contribute two extra points to this article.
This ⬇⬇⬇ will change the way your track and measure your Facebook campaigns in Google Analytics.
17. Separate Paid and Non-paid Social Traffic
Sometimes, you might want to separate the paid and organic social media traffic in your Google Analytics reports.
This would make sense if you want to see how much (and what kind of) traffic came from organically sharing vs. promoting your blog article on Facebook.
Note that in order to separate these two traffic sources, you can’t use the same Facebook post for the promoted version. You’ll have to create a new Facebook ad with another URL destination.

Here’s how you should tag non-paid social media posts:
When tagging your non-paid social media posts and the domain as a source (facebook.com, linkedin.com, twitter.com, etc.), use “social” as a medium parameter value.
Example:
- utm_medium=social
- utm_source=facebook.com
- utm_campaign=summer+sale+2017
If you decide to use anything else as a medium (not “social”), make sure you follow the Default Channel definitions or modify your Channel Grouping settings if needed.
How to tag paid social media posts:
I would recommend using “paid+social” as a medium and defining it in the Default Channel Grouping settings as well. Plus (+) character between the words generates a space in GA.
Here’s how you can do it in GA:

If you don’t define “paid+social” as a medium in the Default Channel Grouping settings, it will go under “(Other)” channel in Google Analytics, not “Social” or “Paid Social”, and that’s not the result you want.
Important! Do not use “cpc” as a medium in Google Analytics because it’s defined as a “Paid Search Channel” by default.
If you’d like to dig deeper, you can read these in-depth Q&A article about the Google Analytics UTM parameters or UTM tags.
18. Fix the Fractured Facebook Reports
You’ve probably noticed that your social media traffic (e.g. from Facebook or Instagram) is reported on different lines in Google Analytics and it makes much harder for you to analyze the data and gather insights.
Here’s how your Google Analytics reports usually look like:

If you’d like to fix the reports and only see “facebook.com / referral” in your reports, you can implement the Search & Replace filter in Google Analytics.
That’s how it looks like:
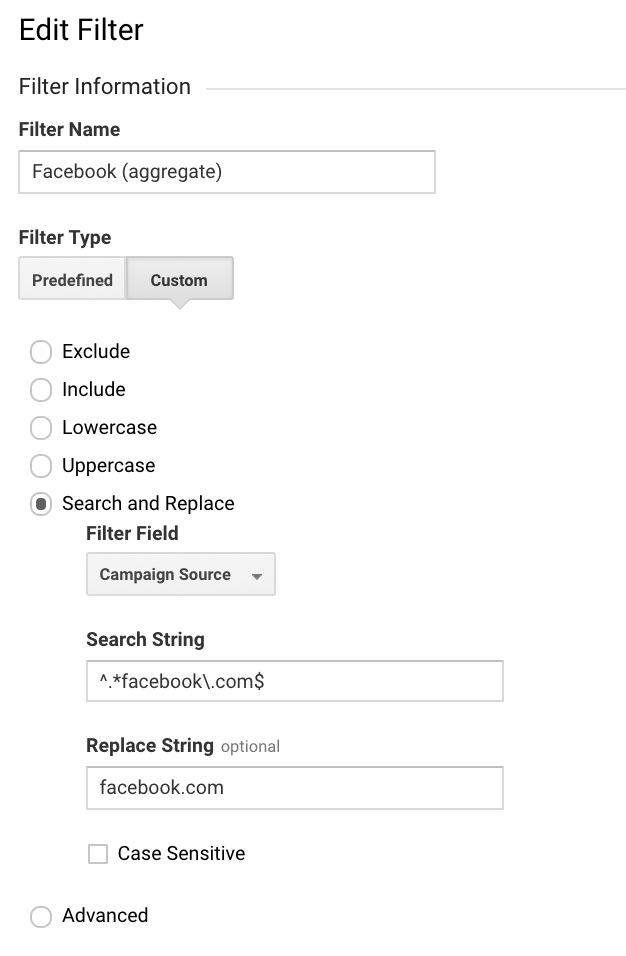
Search string: ^.*facebook\.com$
Replace string: facebook.com
P.S. Filters do not apply retroactively to your data. They are only applied from the moment you create them.
And there you go – you will now see all Facebook traffic as one neat line per each link, giving you a better overview of how much traffic each of your Facebook promotions got.
TL;DR
If this article was too much for you to take in, BUT…
…you still want to know all the hacks of how to promote your blog, here’s a handy checklist with everything we covered:
- It always (99.99% of times) makes sense to share your blog articles on Facebook
- Share your blog articles as Facebook page posts
- Use the Facebook Audience Optimization feature
- Take your time to write a powerful headline (use numbers, keep it actionable)
- Write a compelling introduction (start with a question, make a bold statement)
- Use symbols and emojis for extra attention
- Craft the perfect Facebook post image (standard size is 1200px x 628px)
- Avoid using stock photos and develop a strong brand language
- Test large-format images vs. the regular link posts
- Test carousel and slideshow formats when sharing posts on your Facebook page
- Ask for your team’s support – get them to like and share
- Promote your blog articles on Facebook for higher reach
- Set up a Facebook Boosted post or promote your blog article as a Facebook ad
- First, advertise to your fans, brand ambassadors, and existing customer base
- Test multiple target audiences (past blog readers, people interested in the topic)
- Measure the right metrics (CTR, CPC, time on page, pages per session, conversions)
- Track paid and non-paid social media traffic separately in Google Analytics
- See Facebook traffic as one line, not five lines in Google Analytics by using Search & Replace filter
There you go. Now go to your Facebook page and share a blog article, then create a Facebook promoted post or an ad, and enjoy the increased blog traffic!


